The short answer
On Windows, Steam saves screenshots to C:\Program Files (x86)\Steam\userdata\<account id>\760\remote\<app id>\screenshots. Every game gets its own folder, named after its store number, not its name.
You almost never need to type that. In the Steam client open View > Screenshots, pick the game, select a shot and choose Show on disk. Steam opens the exact folder for you.
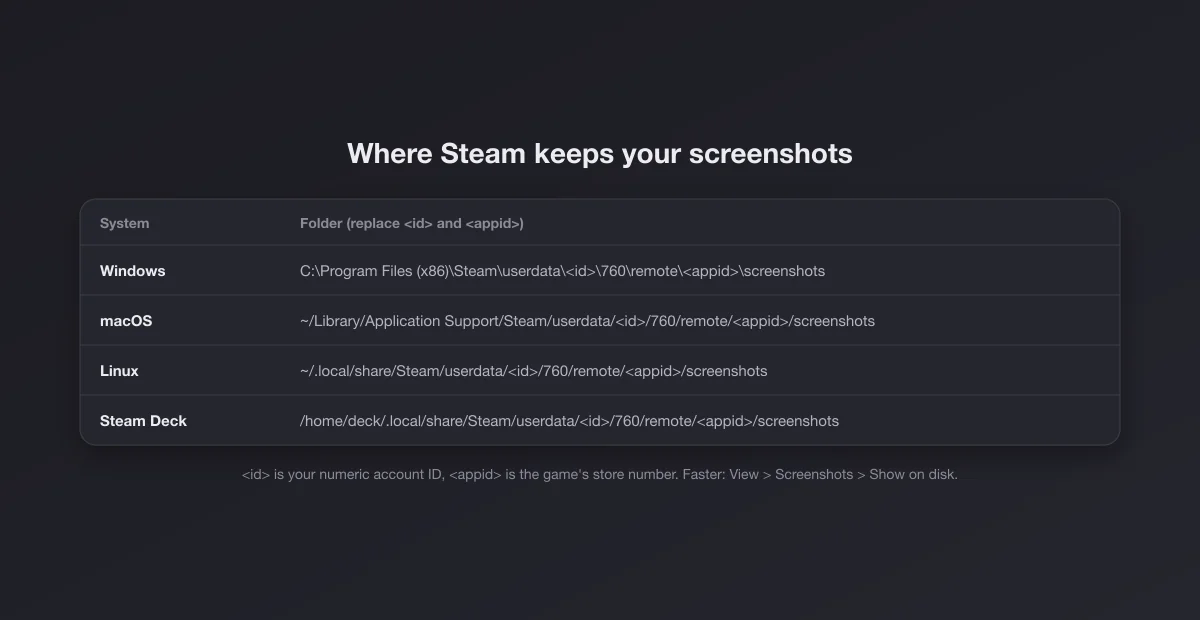
The path on every system
| System | Folder |
|---|---|
| Windows | C:\Program Files (x86)\Steam\userdata\<id>\760\remote\<appid>\screenshots |
| macOS | ~/Library/Application Support/Steam/userdata/<id>/760/remote/<appid>/screenshots |
| Linux | ~/.local/share/Steam/userdata/<id>/760/remote/<appid>/screenshots |
| Steam Deck | /home/deck/.local/share/Steam/userdata/<id>/760/remote/<appid>/screenshots |
Three things change that path. If you installed Steam on another drive, the first part is wherever you put it (for example D:\Steam); the userdata part stays the same. On Linux, some distributions and the Flatpak version put Steam under ~/.steam/steam or ~/.var/app/com.valvesoftware.Steam, which lead to the same userdata tree. And on a Mac, ~/Library is hidden: in Finder, press Shift + Command + G and paste the path.
What the numbers in the path mean
The path has two numbers that look random and are not.
- The account folder under
userdatais your Steam account ID, the short form of your SteamID. If several people have logged into Steam on the same computer you will see several of these folders, one per account. The one with the most recent modified date is usually yours. - 760 is always 760. It is the internal number Steam uses for its screenshot storage, the same on every account and every system.
- The game folder under
remoteis the game's app ID, the same number you see in its store URL. Counter-Strike 2 is730, Dota 2 is570. Openstore.steampowered.com/app/followed by the number and you will see which game it is.
Non-Steam games you added to your library get a long generated number instead of a store ID, so they will not match any store page. Their screenshots still land in the same remote folder.
Finding your account folder without guessing
If you have more than one folder under userdata, the fastest way to know which is yours is the client itself: use Show on disk from the screenshot manager once and note the number in the path it opens. The manual way: your account ID is your 17 digit SteamID64 minus 76561197960265728. Your SteamID64 appears in your profile URL if you never set a custom one, and any SteamID lookup site will show both numbers side by side.
The screenshot manager, which is usually all you need
Since the 2023 client redesign, Steam has a proper screenshot manager. Open it from View > Screenshots in the menu bar of the client. You get every capture grouped by game, with buttons to upload to your Steam profile, delete, copy, and Show on disk. Uploading is optional: screenshots stay local unless you choose to share them.
Two folders live next to each other in each game's directory: screenshots, with the full images as JPG, and screenshots\thumbnails, with small previews Steam uses in the manager. If you delete a file by hand, Steam may keep showing a broken thumbnail until you delete it from the manager too, so it is cleaner to manage them from inside the client.
Saving copies somewhere easier, in full quality
This is the setting most people actually want. Go to Steam > Settings > In Game. In the screenshots section you can tell Steam to also save an external copy of every capture to a folder you choose, and to save that copy as a lossless PNG (older clients call it "save an uncompressed copy").
Two details that matter:
- The original stays where it was. Steam keeps its own JPG in
userdatano matter what; the external folder gets an extra copy. You are not moving the library, you are adding a second destination. - The Steam copy is compressed. The JPG in
userdatais fine for sharing but loses detail in dark scenes, fine text and gradients. If you capture for wallpapers, reviews or anything you will edit, the lossless PNG copy is the one to keep. It is several times larger, so point it at a drive with space.
| Copy | Format | Location | Best for |
|---|---|---|---|
| Steam's own | JPG, compressed | userdata\...\screenshots | Uploading to your profile, quick sharing |
| External copy | PNG if lossless is on | Any folder you pick | Editing, wallpapers, archiving |
Changing the screenshot key
The default key is F12. In the same Settings > In Game panel you can assign another key or a combination. Worth doing if a game already uses F12 (some use it for their own photo mode or a debug console), or if your keyboard puts F12 behind Fn. In the same section you can turn off the notification and the sound that play when a screenshot is taken.
On a Steam Deck the button combination is Steam + R1. The capture appears in the Deck's Media section, and in Desktop Mode the files are in the Linux path above.
When F12 does nothing
Steam screenshots go through the Steam overlay. If the overlay is off, F12 does nothing at all, with no error. Three causes, in order:
- The overlay is disabled, either globally in Settings > In Game or for that game in its Properties > General. Turn it back on.
- The game was not launched through Steam. If you start the .exe directly or through another launcher that does not hand off to Steam, the overlay never loads.
- Another app claims the key. Recording tools and some launchers grab F12 or the Print Screen family. Remap Steam's key to something unused.
If none of that works, capture with the system instead: on Windows, Win + Alt + Print Screen uses the Game Bar and saves to Videos\Captures. Our guide to every Windows screenshot method covers the rest, and if Print Screen is not working either, that page has the fixes.
Steam Deck: finding screenshots in Desktop Mode
In Gaming Mode you do not need the folder: press the Steam button, open Media, and every capture is there, with options to upload or share. To get the files off the Deck, switch to Desktop Mode (Steam button, Power, Switch to Desktop), open Dolphin, the file manager, and turn on hidden files from its menu, because .local starts with a dot. Then follow /home/deck/.local/share/Steam/userdata/ down to the game.
From there you can copy to a USB drive or a microSD card, or upload them to your Steam profile from Gaming Mode and download them on your PC, which is often faster than any cable.
Why some screenshots are missing
- You captured with the system, not Steam. Win + Print Screen saves to
Pictures\Screenshots; see where screenshots go on Windows. On a Mac, system captures go to the Desktop by default, see where screenshots go on Mac. - You are looking under the wrong account. Each Steam account on the machine has its own
userdatafolder. - The game has its own capture key. Many games with photo modes save to their own folder, often under
Documentsor the game's install directory, and Steam never sees those images. - Steam Cloud is not involved. Despite the
remotefolder name, local screenshots are not synced between computers unless you upload them to your profile.
Black or washed out screenshots
A black capture usually means the game runs in exclusive fullscreen and the overlay could not read the frame; switching to borderless windowed fixes most cases. A washed out, grey looking capture usually means the game runs in HDR and the screenshot was saved in a standard range; newer Steam clients handle HDR captures better than older ones, and turning HDR off for the session is the reliable workaround.
Uninstalling: the trap that deletes everything
Uninstalling a single game does not touch its screenshots. They stay in userdata and in the screenshot manager, and they are still there if you reinstall the game years later.
Uninstalling Steam itself is different. The uninstaller removes the Steam folder, and userdata lives inside it, so every local screenshot that was never uploaded goes with it. Before you uninstall Steam, move it to another drive, or reinstall Windows, copy the whole userdata folder somewhere safe. Restoring it afterwards is just copying it back into the new Steam folder while Steam is closed.
Backing up and moving your screenshots
There are three sensible ways to keep years of captures safe, depending on how many you have and how much you care about quality.
| Method | Keeps full quality? | Effort |
|---|---|---|
| Turn on the external copy and point it at a synced folder (OneDrive, Dropbox, iCloud Drive) | Yes, with lossless PNG on | Once, then automatic |
Copy userdata\<id>\760 to a backup drive now and then | Steam's JPGs only | Manual |
| Upload to your Steam profile | No, recompressed | Per screenshot |
The external copy to a synced folder is the set and forget option, and the only one that gives you lossless files. Copying the 760 folder is the safety net for what you already have. Uploading to your profile is for sharing, not for archiving: it is public by default unless you change the visibility, and the uploaded version is compressed again.
Renaming and sorting by game name
Because folders use app IDs, a backup full of numbered folders is hard to browse. Two quick fixes: the external copy option writes files you can organise however you like, and in File Explorer you can rename the folders in your backup copy to game names without affecting anything. Do not rename the folders inside Steam's own userdata: Steam expects the app ID and will stop showing those screenshots in the manager.
Once you have the file
Steam's JPGs go straight into Discord or a forum post. If the screenshot is going somewhere more polished (a review, a devlog, a store page mockup) crop it with the Windows crop tools or the Mac ones, and frame it with our screenshot beautifier, which adds padding, a background and rounded corners in the browser without uploading anything.