The short answer
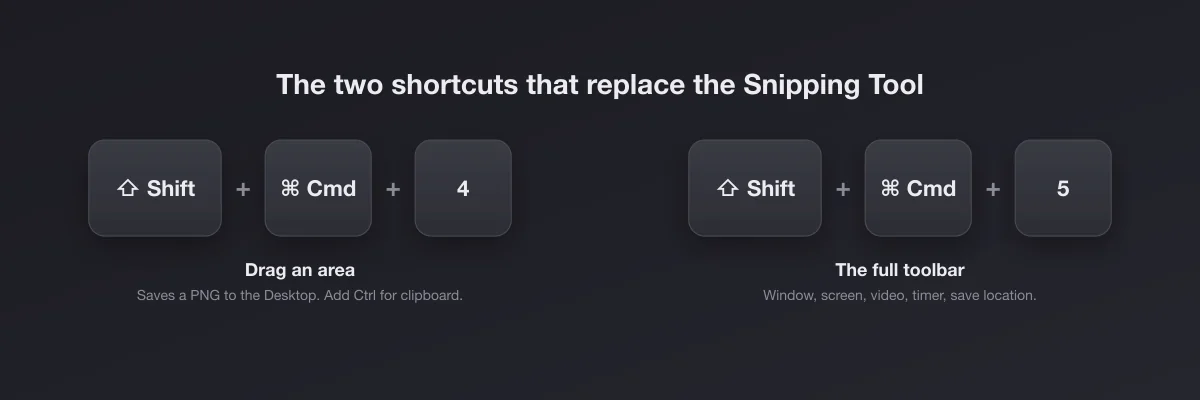
The Mac's Snipping Tool is Shift + Command + 5. It opens a toolbar with the same choices: a dragged area, a window, the whole screen, video recording, a timer and where to save. For the everyday snip, Shift + Command + 4 is the direct twin of Win + Shift + S: drag a box and you have a screenshot.
Two real differences. A plain Mac screenshot saves a file to the Desktop instead of going to the clipboard (add Control to change that), and on macOS 26 Tahoe and earlier the built-in video recording captures your microphone but not the sound your Mac is playing (macOS 27 added an Include System Audio option). Everything else on the Snipping Tool has a free equivalent already on your Mac.
Is there an official Snipping Tool for Mac?
No. The Snipping Tool is part of Windows and Microsoft has never released it for macOS, on the App Store or anywhere else. Anything you find named "Snipping Tool for Mac" in a download site is a third-party app borrowing the name, so treat it with the usual caution. Apple's own capture tool is called Screenshot, it lives in Applications, Utilities, and Shift + Command + 5 is just a quick way of opening it.
Every Snipping Tool feature, mapped to the Mac
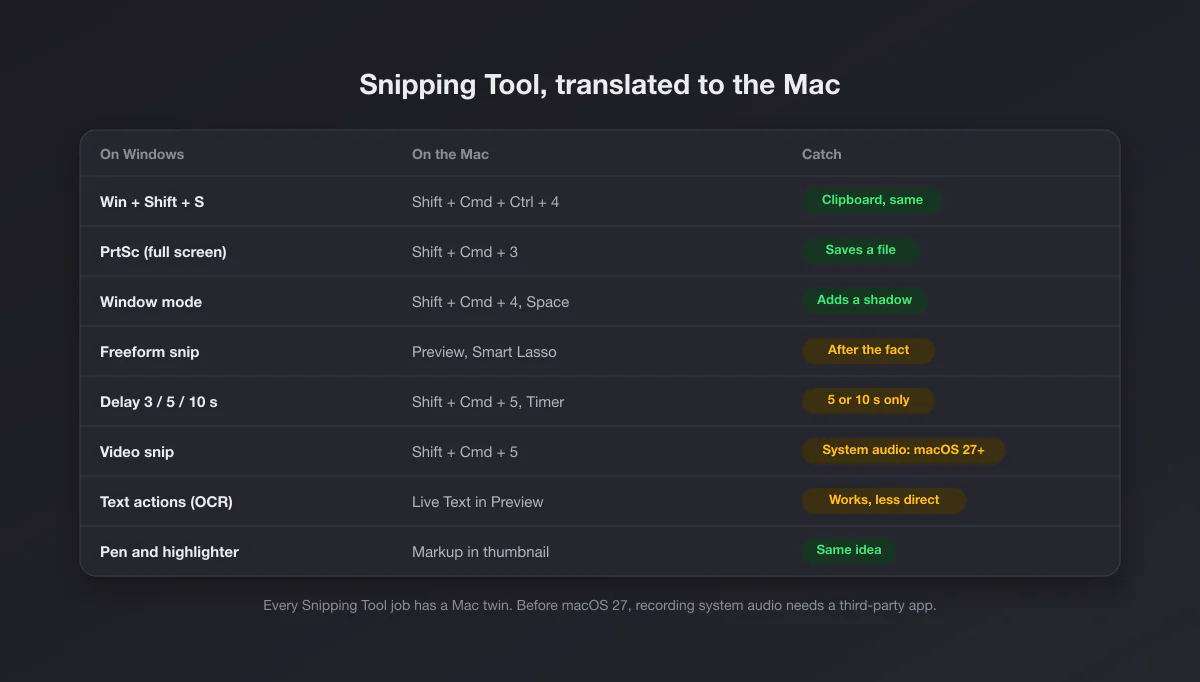
| Snipping Tool on Windows | Mac equivalent | How close |
|---|---|---|
| Win + Shift + S, rectangle | Shift + Cmd + 4, then drag | Identical, except it saves a file |
| Snip straight to the clipboard | Shift + Cmd + Ctrl + 4 | Identical |
| Full screen snip, or PrtSc | Shift + Cmd + 3 | Identical |
| Window snip | Shift + Cmd + 4, then Space, then click | Better: adds a clean shadow (hold Option to drop it) |
| Freeform snip | No live equivalent; crop afterwards with Preview's Smart Lasso | Weaker |
| Delay of 3, 5 or 10 seconds | Shift + Cmd + 5, Options, Timer | Close: 5 or 10 seconds only |
| Video snip, Win + Shift + R | Shift + Cmd + 5, Record Selected Portion | Weaker before macOS 27: microphone only, no system audio |
| Pen, highlighter, shapes, crop | Markup, from the floating thumbnail | Same idea, slightly more tools |
| Text actions (copy text from a snip) | Live Text: open the image in Preview and select the text | Works, one step more |
| Quick redact (emails, phone numbers) | Draw a filled box in Markup | Manual |
| Auto-save to Pictures\Screenshots | Saves to the Desktop by default, changeable | Same, different folder |
The everyday snip: Shift + Command + 4
Press the three keys together and the pointer becomes a crosshair with pixel coordinates next to it. Drag over what you want and let go. That is the whole gesture, and it is the one that covers nine snips out of ten.
A few modifiers make it better than its Windows counterpart, all held while dragging:
- Space moves the whole selection without resizing it, useful when you started a few pixels off.
- Shift locks one edge, so you only adjust the other.
- Option resizes from the centre.
- Esc cancels without saving anything.
For the complete list of combinations, including the Touch Bar one, see our page of Mac screenshot shortcuts.
The clipboard difference that confuses Windows switchers
On Windows, a snip lands on the clipboard and you paste it. On a Mac, Shift + Command + 4 writes a PNG file to the Desktop and puts nothing on the clipboard. People coming from Windows press Command + V in a chat, get nothing, and assume the screenshot failed.
Two fixes. Add Control to any shortcut (Shift + Command + Control + 4) to send that one capture to the clipboard. Or make the clipboard the default: press Shift + Command + 5, open Options, and under Save to pick Clipboard. From then on every capture behaves like the Snipping Tool.
If you keep the file default and lose track of them, where screenshots go on a Mac explains the Desktop, the naming scheme and how to move them somewhere tidier.
Shift + Command + 5, the Snipping Tool window
This is the closest thing to opening the Snipping Tool app instead of using its shortcut. A bar appears at the bottom of the screen with five buttons and an Options menu:
- Capture Entire Screen, Capture Selected Window, Capture Selected Portion for stills.
- Record Entire Screen and Record Selected Portion for video.
- Options: save location (Desktop, Documents, Clipboard, Mail, Messages, Preview or any folder), a timer of 5 or 10 seconds, the microphone for recordings, whether to show the floating thumbnail, whether to remember the last selection, and whether to include the mouse pointer.
The settings you pick here stick, and they apply to Shift + Command + 3 and 4 as well. It is worth opening once just to set the destination you want.
The delay timer, for menus that vanish
The Snipping Tool's delay exists to catch things that disappear when you press a key: dropdowns, hover states, right-click menus. The Mac has the same tool under Shift + Command + 5, Options, Timer. Choose 5 or 10 seconds, click Capture, open your menu, and wait.
For menus specifically there is a quicker trick with no timer at all: open the menu first, then press Shift + Command + 4 and Space, and click the menu itself. It captures just the menu, with its shadow.
Freeform snips: the one capture mode the Mac lacks
The Snipping Tool's freeform mode lets you draw an irregular outline. macOS has nothing equivalent at capture time; everything it captures is a rectangle. The workaround is to capture a rectangle and cut it afterwards: open the screenshot in Preview, choose the Smart Lasso from the selection tools in the Markup toolbar, trace your shape, then Edit, Invert Selection and delete. It is two steps instead of one, which is fine for the rare times you need it. For plain rectangles, cropping a screenshot on a Mac covers the faster routes.
Markup: the pen and highlighter
After any capture a small thumbnail slides into the bottom right corner. Click it before it disappears and the image opens in Markup: pen, highlighter, shapes, arrows, text, a magnifier loupe, crop and rotate, plus signatures. Click Done and it saves. This is the Snipping Tool's edit window, with a couple of extra tools.
If the thumbnail gets in your way, it can be switched off in the Options menu; captures then save instantly, and you open them in Preview to mark them up instead.
Text actions and redaction
Recent versions of the Snipping Tool can pull text out of a snip and blank out emails and phone numbers automatically. On a Mac, the text part is handled by Live Text: open the screenshot in Preview (or press Space on it in Finder for Quick Look) and drag across the text as if it were a document, then copy. It works in many languages and needs no setting.
Automatic redaction has no built-in Mac equivalent for images. The manual version is a filled rectangle drawn in Markup over whatever is private. Make sure the shape is filled, not just outlined, and remember that blurring with a light effect can sometimes be reversed; a solid block or heavy pixelation is safer.
Video: where the Mac falls short
The Snipping Tool on current Windows 11 records the screen with the microphone and the system audio. The Mac's built-in recorder, under Shift + Command + 5, depends on your macOS version. On macOS 26 Tahoe and earlier it records the screen and a microphone only: the Options menu lists microphones and nothing for the sound the Mac itself is playing, and QuickTime's recorder has the same limit. On macOS 27 Golden Gate or later, Apple added an Include System Audio option to the same menu (per its support article published September 14, 2026), which closes the gap. Check your version under Apple menu, About This Mac.
So if you are recording a tutorial with your voice, the built-in tool is enough. If you need the app's own sound in the recording (a video call, a demo with sound effects, a game), turn on Include System Audio on macOS 27 or later; on older versions you need a third-party recorder. Free options exist, OBS being the best-known, at the cost of a steeper setup. Recordings save as .mov files.
Where Capturo fits
Disclosure: Capturo is our app. It is a native Mac app, about 2 MB, and its pitch is narrow. It does not replace the shortcuts above, it picks up where they stop:
- Screen recording with system audio (⇧⌘9), composed live over a gradient background with rounded corners, with an optional webcam bubble, and conversion of clips up to 45 seconds to GIF. This is the one gap in the table above if your Mac runs macOS 26 or earlier.
- Captures (⇧⌘2) open straight into an editor with arrows, text, highlight and pixelated blur for private details, plus your own logo on the margin.
- Pinning a capture so it floats above other windows while you work.
What it does not do: no scrolling capture, no OCR, and it is Mac only. It costs $29 once, with a 30-day money-back guarantee and no subscription. If the built-in tools already cover what you do, keep using them; the details are on the download page. For the wider field, see the best screenshot app for Mac and the best screen recorder for Mac.
Which tool for which job
| You want to… | Use |
|---|---|
| Grab part of the screen and paste it | Shift + Cmd + Ctrl + 4 |
| Save part of the screen as a file | Shift + Cmd + 4 |
| Capture one window cleanly | Shift + Cmd + 4, Space, click |
| Catch a menu or hover state | Shift + Cmd + 5 with a timer |
| Copy text out of a screenshot | Live Text in Preview |
| Record with your voice | Shift + Cmd + 5, built in |
| Record with the Mac's own sound | Built in on macOS 27 or later; otherwise Capturo or OBS |
| Record as a GIF | A third-party tool, such as CleanShot X, or Capturo, which converts short recordings to GIF |
| Make a capture presentable for a post or a doc | Our free screenshot beautifier in the browser |
Coming from Windows: three habits to reset
Look on the Desktop, not in Pictures. Mac screenshots are named "Screenshot [date] at [time].png" and sit on the Desktop unless you changed it. Use Command, not Control, for copy and paste once you have them. There is no Print Screen key on a Mac keyboard; if you use a Windows keyboard on a Mac, the Print Screen key usually does nothing, so learn Shift + Command + 3 instead. The full walkthrough for newcomers is in how to screenshot on a Mac.