The fastest way: right-click in Finder
Since macOS Monterey, the converter is built into Finder. Select one HEIC or a thousand, right-click, Quick Actions, Convert Image, choose JPEG and a size, and the copies appear next to the originals. Nothing to install, nothing opens, and the originals stay untouched. For most people this is the whole answer.
No Mac at hand, or a whole folder to convert? Our HEIC to JPG converter runs in any browser, converts in batches and never uploads the photos, with an option to strip the GPS location.
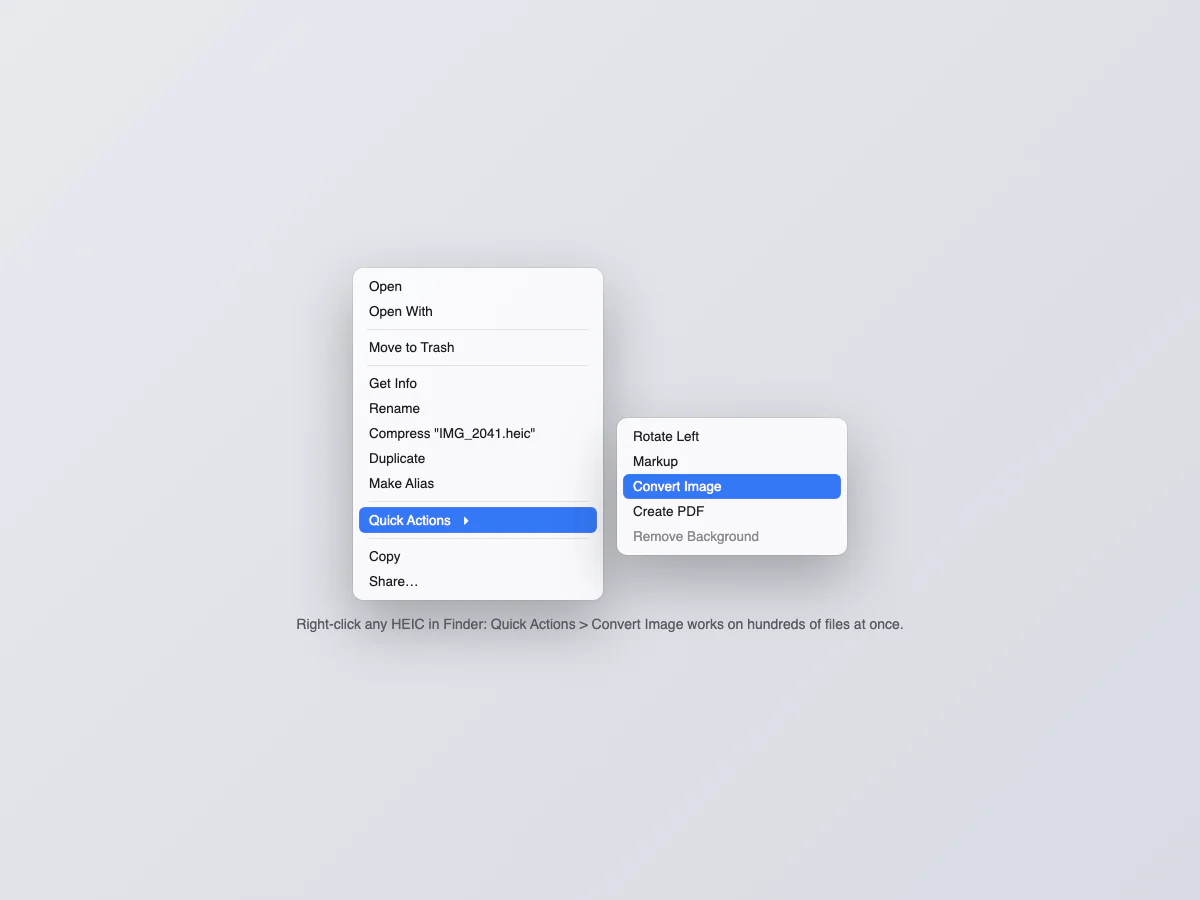
The little dialog that appears has three decisions worth two sentences. Format: JPEG for photos going anywhere normal, PNG only if you need transparency (photos never do), HEIF converts the other direction. Image size: Actual Size unless the destination is email or a form with upload limits, where Large usually lands under the cap. And the "Preserve metadata" checkbox decides whether date, camera and location travel inside the copies; uncheck it for photos going to strangers.
Method 2: Preview, when you want quality control
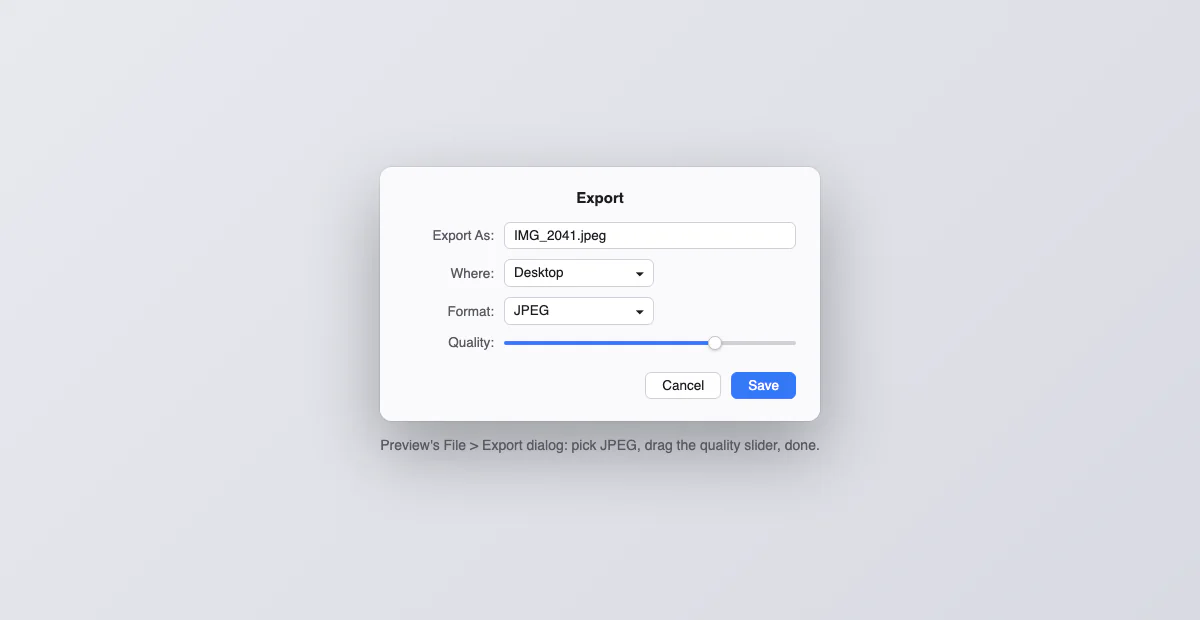
Open the HEIC in Preview, then File, Export, set Format to JPEG and drag the quality slider. This is the method to pick when the JPG is going somewhere that cares about file size, because the slider gives you the tradeoff directly. For several files at once: select them all in Finder, open together (they load into one Preview window), select all thumbnails in the sidebar, and use File, Export Selected Images.
Method 3: the Photos app, for photos that live in your library
Anything already imported into Photos does not need Finder at all: select the photos, then File, Export, Export Photos and pick JPEG. Two details worth knowing: "Export Unmodified Original" keeps HEIC, so use the plain Export; and dragging a photo out of Photos onto the desktop already converts it to JPEG on most versions, which is the fastest single-photo path there is.
Method 4: the Terminal, for folders on a schedule
The sips tool ships with macOS and converts a whole folder in one line (the bracket pattern also catches iPhone files named .HEIC in capitals, which a plain *.heic misses in zsh):
sips -s format jpeg *.[hH][eE][iI][cC] --out converted/
Run it inside the folder of HEIC files (create converted first). It keeps EXIF data, needs no confirmation per file, and can live inside any script or Automator workflow. Overkill for one photo, exactly right for a recurring job.
Which method when
| Situation | Use |
|---|---|
| A handful of files, right now | Finder Quick Action |
| One file where size matters | Preview export with the quality slider |
| Photos already in your library | Photos export, or drag to desktop |
| Hundreds of files, or every week | sips in the Terminal |
HEIC vs JPG, in numbers
| HEIC | JPG | |
|---|---|---|
| File size for the same photo | Roughly half | Baseline |
| Opens on Macs | Yes, natively | Yes |
| Opens on Windows out of the box | Not always: needs the HEIF and HEVC extensions | Yes |
| Upload forms and old software | Frequently rejected | Universally accepted |
| Color depth | Up to 10-bit | 8-bit |
| Live Photos, bursts, depth data | Supported in the container | Lost on conversion |
The summary: HEIC is the better format for storing, JPG is the better format for leaving your machine. Which is why the sane setup is keeping HEIC originals and converting copies on the way out.
Automate it: a folder that converts by itself
If converting is a weekly chore, make it a zero-click one. In the Shortcuts app, create a shortcut with a Convert Image action set to JPEG, and add it as a Quick Action; it then appears in every right-click menu with your exact settings. Or go further with a Folder Action in Automator: any HEIC dropped into a chosen folder converts automatically, which turns the whole problem into "drag files here". The sips one-liner above inside a scheduled script achieves the same for server-minded people.
When something refuses to work
Three failures cover almost every case. Convert Image is missing from Quick Actions: your macOS is older than Monterey; use the Preview method, which works back to much older versions. The exported photo is still HEIC: you used "Export Unmodified Original" in Photos; the plain Export with JPEG selected is the converting one. sips says "unable to write": the output folder does not exist yet; create it first, then rerun the command.
HEIC, HEIF, HEVC: three names, two problems
The naming tangle causes half the confusion. HEIF is the container standard, HEIC is Apple's flavor of it for photos, and the two extensions behave identically; everything on this page applies to both. HEVC (also called H.265) is the matching video codec: when a .MOV from your iPhone refuses to play somewhere, that is the video edition of the same problem, and the fix lives in the same place (iPhone Settings, Camera, Formats, Most Compatible covers both photos and videos).
On an older Mac that cannot open HEIC at all
HEIC support arrived with macOS High Sierra in 2017. On anything older, Preview and Quick Look refuse the files entirely, and the conversion methods above never get their chance. The workarounds, in order of dignity: import the photos into the Photos app anyway (older versions often convert on import), have the iPhone do the conversion before sending (the Most Compatible setting, or share via Mail to yourself), or upload the files to iCloud.com and download them back, which hands you JPEGs. If the Mac can run anything newer than High Sierra, updating is the real fix.
Why your iPhone keeps sending HEIC
HEIC is Apple's default camera format because it stores the same photo at roughly half the JPG size. The Mac opens it natively; the problem starts when the file leaves for a Windows PC, an upload form, or an old tool. Two upstream fixes: on the iPhone, Settings, Camera, Formats, Most Compatible makes the camera shoot JPG from then on (at double the storage cost); and when sharing by email or Messages, iOS usually converts automatically, so the HEIC problem mostly appears with AirDrop, cables and cloud drives.
Quality and metadata: what survives the conversion
All four methods decode the same pixels, so image quality differences come only from the JPG compression level: Quick Actions and Photos pick a sensible default, Preview and sips let you choose. EXIF metadata (date, camera, location) survives Quick Actions, Preview and sips; note that location data traveling inside shared photos is a privacy consideration, not a technical one. And conversions are copies: your HEIC originals stay exactly as they were.
The double-file trap: converting does not free space
Every method here creates copies, so after a big batch you hold both the HEICs and the JPGs, and the JPGs are roughly twice the size. On a full disk that math goes the wrong way fast. The safe order: convert, verify the JPGs open, then delete the HEIC copies you exported for, keeping the originals wherever they normally live. And if the originals sit in Photos with iCloud, "Optimize Mac Storage" in Photos settings already keeps only small local versions, in which case exporting and converting everything locally defeats the point; convert on the way out, per batch, as needed.
Got a WebP or AVIF instead?
HEIC comes from cameras; the web has its own awkward formats. If the file that refuses to open is a .webp or .avif saved from a website, the same two-click fix exists in the browser: our free WebP to JPG converter and AVIF to JPG converter run locally, with nothing uploaded. If you are unsure which format to keep at all, read JPG vs PNG.